We can see LED display everywhere,but what is the determined factor for its price,do you think of ot before youbuying one? there are 3 industry terms for LED signs you need to understand.
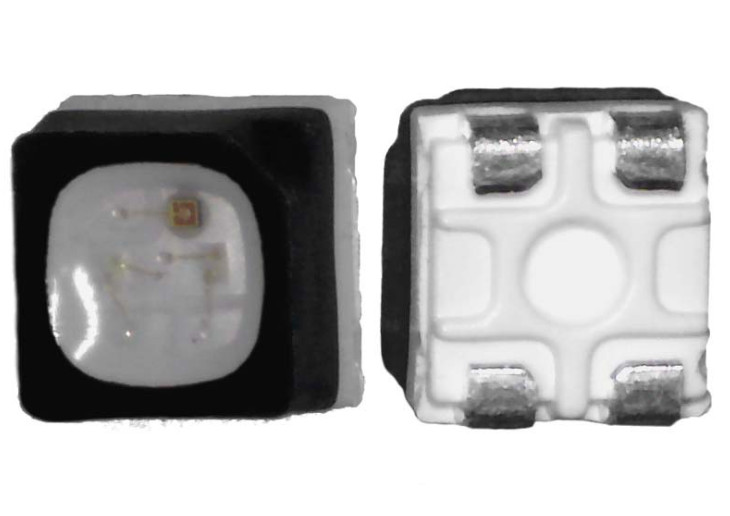
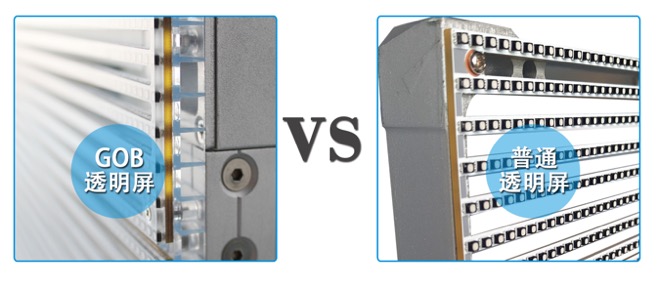
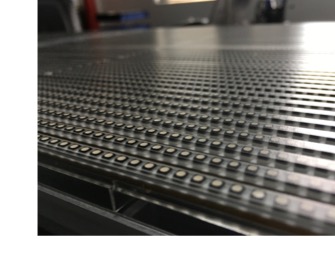
The individual LEDs are are grouped together in what is known as a 'pixel'. The number of LEDs in each pixel varies. There could be one LED or there could be 25 LEDs in one pixel.
The major factor which determines the number of LEDs in a pixel is the 'pitch' of the pixels in the LED sign. The pitch is the distance from the center of one pixel to the center of the next pixel. The pitch determines how crisp the image will be.
If there are 2 LED signs sitting side by side and each one is the same height and width but they have different pitches, the LED sign with the smaller, tighter pitch, will have more pixels and thus a better resolution.
Selecting the right pitch when you are purchasing an LED sign may save you money as well as getting you the appropriate resolution for your particular application so make sure you read the section on choosing the right size LED sign.
The third term is 'matrix'. The matrix is made up of the number of pixel high and the number of pixels wide of an LED sign is. The matrix is what determines the physical size of the sign. If an LED sign is 24 pixels tall and 96 pixels wide, the matrix is 24x96.
With monochrome led signs and with an indoor led sign, the matrix determines how many lines of text you can put on the sign as well as how many characters will fit on each line. With programmable color LED signs the matrix determines how much total space you have. A quick word or caution, having the correct height to width ratio is CRITICAL in color LED signs, you should always consult an LED sign professional for help determining the best matrix for a color LED sign.
So to sum it up...
The first question you need to ask yourself is do I need a color LED sign or Outdoor Electronic Monochrome LED Displays. Most sign salesmen will tell you that a color LED sign is more effective. I'm not one of those guys. Color can be more effective for some applications but not all applications. The only thing you can say about color LED Displays that is true for every application is that it is more expensive than monochrome LED signs.
So how do you know if the additional cost is justified? Ask yourself this question: "Can my product or service be sold with a picture?".
If you sell insurance there are probably no pictures that will help you sell your product, words will sell your product.
If you sell cars you can definately sell your product with pictures.
If you answered "No" then properly sized Monochrome Electronic LED Signs are probably the way to go. A properly sized monochrome LED sign is just as, if not more, effective as a color LED sign if picures and video are not helpful. You will also save a bundle in aquiring the sign.
If you answered yes, you should consider a color LED sign. They do cost more but if images can help you sell, the additional cost might be justified. Talk to an LED sign professional for help determining if a color LED sign is the way to go.
Properly answering this requires a careful review of the location for the sign as well as the specific application. If you talk to a sign salesperson who does not inspect your property and ask questions about your application, be very wary, they are probably more interested in making a sale than in making sure you get the right LED sign.
There are several factors that must be considered. For instance:
And the list goes on.
Of all the items listed above, content is the most involved. If you are getting a monochrome LED sign you need to know what you want to say AND the most effective way to say it. Then you must consider the traffic patterns. The speed limit and viewing distance will affect the the viewing time. Your towns sign ordinance can also have an impact here.
Once you have all that information (actually you need more information than that but those are the basics) you can determine your matrix (scroll back up for a review of what the matrix is).
Now you need to determine the correct pitch. A smaller/tighter pitch will make the minimum character size smaller.
So, if your LED sign will be viewed from a long distance by people in cars travelling 45mph you will need a larger character size to make sure the traffic can read it. That means you will need a larger pitch.
If your sign will be close to the traffic and the speed limit is 25mph you can use a small character size, and smaller pitch, and your message will still be readable.
Determining the matrix and the pitch is even more complicated if you are getting a color LED sign because you must carefully consider the application as well as the aspect ratio.
As a rule of thumb, with color LED Displays, the smaller the matrix and the larger the pitch, the grainier the picture on the LED sign will be.
Viewing distance also plays a role in how high of a resolution you need. If the LED sign will be viewed from a long distance you do not need as much fine detail. The closer the viewer is to the LED sign, the more detail you need. You must carefully consider what kind of content you will putting on the LED sign and the viewing distance.
If all of this seems complicated and possibly a bit overwhelming, don't worry, that is what we are here for. We have a process for going over all the details of your location and application. Then, and only then, we will make a recommendation to you.
Remember, if your LED sign is too big, you wasted money. If your LED Display is too small, you wasted money. Only a properly sized LED sign will give you the most bang for your buck (also known as the best ROI).
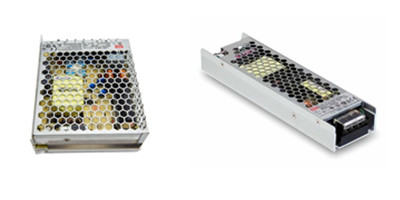
The true cost of an LED Display is in the number of individual LEDs in the sign. The size of the box housing the LEDs isn't really important when it comes to pricing, in fact, that box is relatively inexpensive. The circuit boards which control the LED sign aren't the key factor in pricing, like the box they are relatively inexpensive. The key factor is the number of LEDs in the sign.
If you are considering acquiring an LED sign that is 32 pixels high and 96 pixels long and you are looking at two different brands which appear to be almost identical, even the pricing is close, which LED sign is the better bargain? There is one key piece of information you need to start to answer that question: How many LEDs are in each pixel?
Remember, pixels are groups or clusters of individual LEDs. The LED sign in this example has 3072 PIXELS (32 pixels high x 96 pixels wide). If one brand has 8 LEDs in each pixel than you are getting 24,576 LEDs. If the other brand only has 4 LEDs per pixel you are getting 12,288 LEDs.
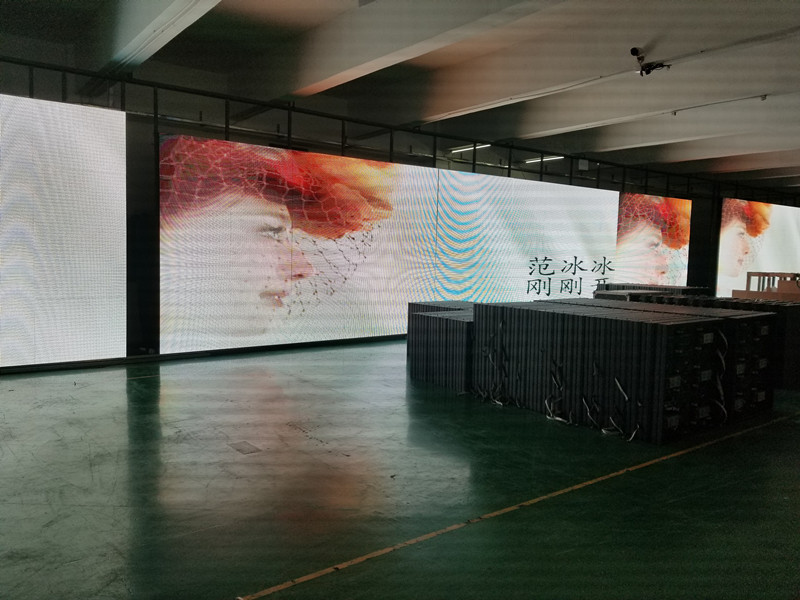
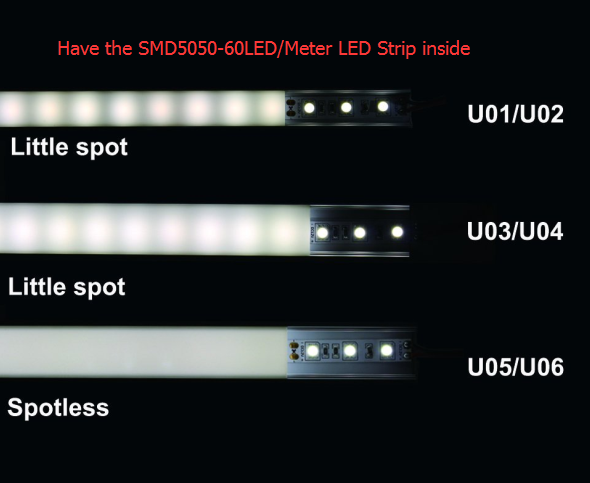
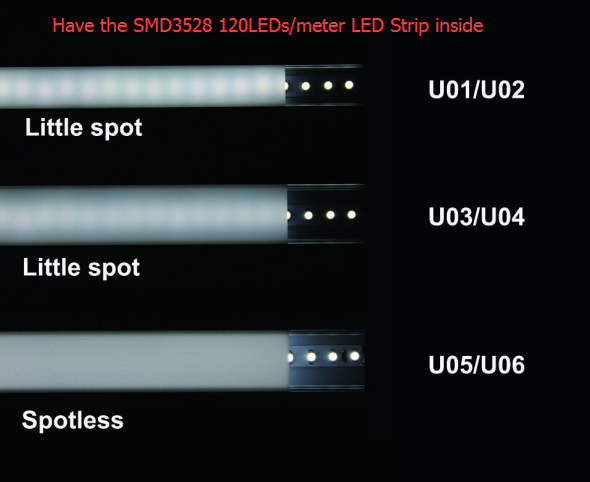
LED density is a good indicator for comparing LED display performance. Just like your car's engine, more cylinders generally mean more power. More LEDs per pixel generally mean higher brightness and better performance. A low brightness, unreadable LED display will not help you increase your sales because it's less likely your customers will notice and read what you have to say.
The answer is probably getting pretty clear. More LEDs equals more brightness, more clarity, more attention, more customers.
The number of LEDs per pixel is also important because of degradation. Generally speaking, an LED diode will lose about 20% of its initial brightness after the first 2000 hours of use (about 3 months). After that, the LED's brightness degrades very slowly until it dies at the estimated lifetime of 100,000 hours (about 11 years). When shopping for an LED sign, it is important to keep in mind that the manufacturer's claimed display brightness will drop about 20% after 2 to 3 months of operation.
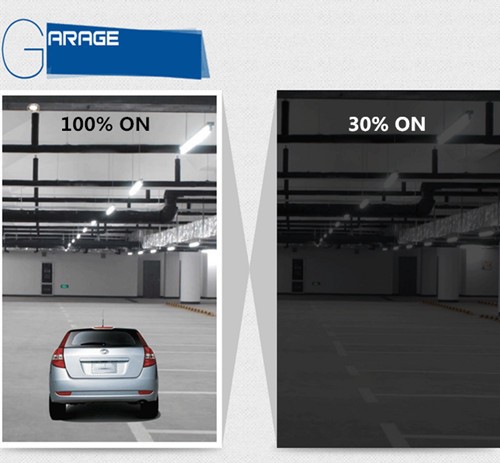
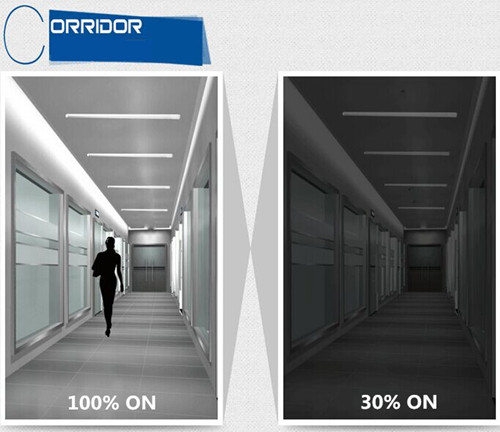
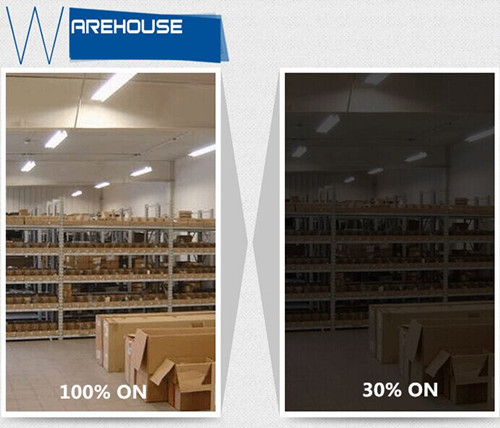
Another consideration is the viewing angle of the sign. LEDs can put out a single, narrow beam of light like a flashlight, or they can put out a wide beam across a room like a light bulb. LEDs put out about the same amount of light no matter what type they are - but the "high-beam" LEDs with a narrow angle focus more light into one small spot, whereas the "wide angle" LEDs spread their light across the horizon. So, if you were to stand in front of a sign made from "high-beam" LEDs with narrow viewing angles, you would see an extremely bright sign, as long as you stood directly in front of it, but the minute you walked away from the front of the sign, where the "high beam" is focused, you would see nothing but black.
With wide viewing angle LEDs, the image is visible in consistent brightness and uniform colors throughout the entire viewing range of the display. A quality LED sign will have 140� of viewing angle which maintains the highest color accuracy and extends reading times.
There are 3 ways to build LED signs.
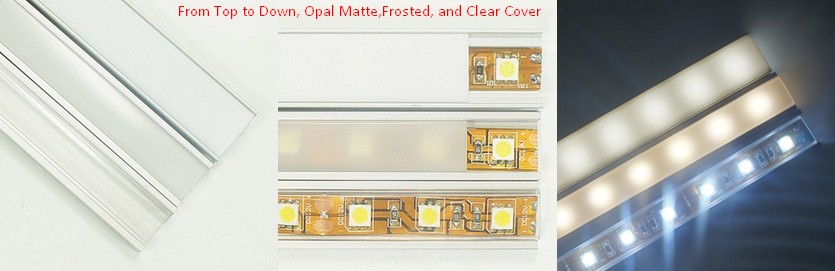
The first is to solder the LEDs directly to the circuits boards AND put a plexiglass face over the LED sign face to weatherproof it. There are several drawbacks to this method. First the plexiglass shield will cause glare from the sun which will make your sign harder to read during the day. Second, beacuse the LEDs are soldered to the circuit board. If one LED goes out you sign has to be turned off, opened up, and an entire board must be replaced. This will cause a quilting effect in your sign where one section is brighter then the surrounding areas.
The second, and next best method, is to solder the LEDs directly to the circuit board but seal the entire face of the sign, without a plexiglass face shield. This eliminates the sun glare problem but it still has all the other drawbacks of the first method.
The third, and best, method is to use individually sealed pixels. With this method each pixel can be removed individually without turning off and opening the sign. This eliminates all the drawbacks of the other two methods.
The biggest thing to watch out for is sign sales people. I am not saying they are dishonest, most of them are very honest, hard working people. Most of them also lack the experience and/or knowledge to properly size and program an LED sign. They are expert tradesmen who really know how to build and install signs but LED signs have special issues that require special expertise.
Make sure that whoever you are dealing with is an expert at properly sizing and programming LED signs.
If they do not take the time to roll up their sleeves and really dig into your application and circumstances you need to be very wary of them. An LED sign is not a one size fits all, one phone call, purchase. They require careful planning and consideration. Do yourself a favor and talk to a professional.
]]>–We can calculate each strip’s power by knowing the LED Type and its rated power for each LED. The formula to calculate is Power Consumption = Wattage of each LED*LED QTY of strip Length.
For example, for 100cm long SMD3528, 150LED/roll model, it’s 30LED per 100cm, so its power consumption is 30*0.08= 2.4Watt.
NOTE: This method the data get is rated power consumption.
In real, once the strip be made into a long run, there is voltage drop, which will cause the lost of the power.
The long the strip, the less real power it produce. A 5meter long strip compare to a 1meter strip, same model, the real power will be 40%-50% less.
The shorter the strip, the real power will much closer to its rated.
And again, some maker will use different resistors to adjust the strip output wattage. For example, if the LED component rated is 60mA, to get better lifespan, will use a big resistor, the current of LED will be used less than rated.
A: Single Chip SMD3528 0.08watt / LED
Note: Now the SMD3528 is replaced by the name SMD2835, 0.1W.
The strip made with this 3528 LED, the models we sell online have:
SMD3528, 150LED per roll, Less Intensity Single Row LED Strip |
SMD3528, 300LED per roll, Medium Intensity Single Row LED Strip |
SMD3528, 600LED per roll, High Intensity Single Row LED Strip |
SMD3528-150 | SMD3528-300 | SMD3528-600 | SMD3528-1200 |
Strip Model |
3528,150LED/Roll |
3528,300LED/Roll |
3528,600LED/Roll |
3528,1200LED/Roll |
|
30LED/Meter |
60LED/Meter |
120LED/Meter |
240LED/Meter |
500cm |
12Watt |
24Watt |
48Watt |
96Watt |
300cm |
7.2Watt |
14.4Watt |
28.8Watt |
57.6Watt |
200cm |
4.8Watt |
9.6Watt |
19.2Watt |
38.4Watt |
100cm |
2.4Watt |
4.8Watt |
9.6Watt |
19.2Watt |
50cm |
1.2Watt |
2.4Watt |
4.8Watt |
9.6Watt |
1feet(30cm) |
0.8Watt |
1.6Watt |
3.2Watt |
6.4Watt |
Remark: 1Roll of the strip is made in 5meters (16.4feet). 1feet=30cm. 1inch=2.54cm. |
B: Single Chip SMD2835 0.2watt / LED
The strip made with this LED, the models we sell online have:
SMD2835, 300LED per roll, Less Intensity Single Row LED Strip |
|
SMD2835, 600LED per roll, High Intensity Single Row LED Strip |
|
SMD2835-300 | SMD2835-600 | SMD2835-1200 |
Strip Model |
2835,300LED/Roll |
2835,600LED/Roll |
2835,1200LED/Roll |
|
60LED/Meter |
120LED/Meter |
240LED/Meter |
500cm |
60Watt |
120Watt |
240Watt |
300cm |
36Watt |
72Watt |
144Watt |
200cm |
24Watt |
48Watt |
96Watt |
100cm |
12Watt |
24Watt |
48Watt |
50cm |
6Watt |
12Watt |
24Watt |
1feet(30cm) |
3.6Watt |
7.2Watt |
14.4Watt |
B: Side viewing SMD335 0.08watt / LED
The strip made with this 335 LED, the models we sell online have:
SMD335, 300LED per roll, Medium Intensity Single Row LED Strip |
SMD335, 600LED per roll, High intensity Single Row LED Strip |
C: Top viewing SMD5050 0.24watt / LED
The strip made with this 5050 LED, the models we sell online have:
SMD5050, 150LED per roll, Less Intensity Single Row LED Strip |
|
SMD5050, 300LED per roll, Medium intensity Single Row LED Strip |
Step 2: Choose the appropriate type transformer
A: Non-waterproof transformer, DC12V, from 1AMP(12watt) to 8AMP(96watt)
B: Non-waterproof Heavy Duty Industrial Series Adapter, DC12V, from 8.5AMP(102watt) to 30AMP (360watt)
C: Waterproof LED transformer, DC12V, from 2.5AMP(30watt) to 8.3AMP(100watt)
Step 3: Select the right AMP
A: if you ordered 1 reel SMD3528 with 300 LEDs (24 watt), and need a waterproof power supply, then check the Waterproof LED transformer, and choose 2.5AMP(30watt)
B: if you ordered 2 reel SMD5050 with 300LEDs (total 0.24*600 = 144 watt) and just want one transformer to run, then can can choose the non-waterproof heavy duty adapter, and choose 15AMP (180 watt)
PS: The AMPs or Wattage of the power supply must higher than the actual power consumption, e.g. for one reel SMD3528 led strip with 300 LEDs, the power consumption is 24watt, but we recommend you choose DC12V 3AMP 36watt power supply for it.
If you have any problem, please contact us!
]]>
2. Flexible LED light strips are assembled with FPC circuit board, assembled with patch LED, so that the thickness of the product is only the thickness of a coin, does not occupy space; the general specification has 30 LEDs, 60 LEDs, 120 LEDs, 240 LEDs etc., different users have different specifications. And it can be cut at will, or it can be extended at will and the illumination is not affected. The FPC material is soft and can be bent, folded and wound freely, and can be moved and stretched in three dimensions without breaking. It is suitable for use in irregular places and small spaces, and because it can be bent and wound arbitrarily, it is suitable for arbitrarily combining various patterns in advertising decoration.
]]>
Downlights and spotlights look similar in appearance, but they are different in many ways. What exactly is the difference between them?
With the use of small, variable-shape LEDs as light sources, downlights and spotlights have evolved into integrated fixtures. Once it becomes a light fixture, it must be considered from both dimensions and light effect.
【Dimension】
Downlight: A small light fixture that shines vertically downwards
Spotlight: The directional light fixtures converge to a small area and play an important role in lighting.
【Light】
When it is no longer excessively pursuing uniform illumination like “a house is full of lights ”, downlights and spotlights have embarked on a “wider stage” from the “previously popular” “rectilinear edge ceilings” to provide home furnishing. The level of texture in the light, the creation of atmosphere, the emphasis on the highlights, the reduction of the details of the quality, and even uniform lighting.
In order to provide these different lighting scenes for life, it is necessary to perform fine control over the light. The luminaire is realized by the property of “beam angle”.
In terms of light, downlights and spotlights do not have obvious boundaries, and they are planned for applications with degrees of beam angle.
Narrow Beam 15°
Flood Beam 37°
Flood Beam 60°
So that in Europe, downlights are now collectively called downlights, which are divided into rotatable downlights (better control of directionality) and fixed downlights. So now, we must keep in mind the concept of beam angles.
How to choose a spotlight with beam angle?
The beam angles of conventional downlights and spotlights are achieved by the refraction of a reflector cup or lens:
Reflector cup
Lens
There are three easy ways to allow us to identify the pros and cons of the human eye:
Observe the fineness of the reflector or lens.
Optics is a very delicate science. A reflector or lens is designed by a photometric laboratory to modulate, open a mold, and have a good manufacturing process to achieve a consistent beam angle.
Its internal structure is like a room full of diamond angle lenses, a slight change in one of the lens, the light will be completely changed, so we observe their fineness can know the pros and cons, the inner wall diamond angle is clearer and more uneven that tells the lens is better.
With the popularization of LED light sources, lamps have been valued as home durable products. How to choose and how to apply?
Then look down...
The choice of downlights and spotlights
【Select the light】
From the phrase “soft lighting but powerful dominance” begins with:
Such contradictory two sets of words is precisely the “first rule” of home lighting design: reducing glare and increasing brightness. Listen to me:
▲ The left and right lights have the same brightness and beam angle. Why is the glare on the left side dazzling? The right side is soft and comfortable?
The difference is that the shading angles of the two luminaires (described below) are different in size. The girl on the right sits in the area of the shielding angle of the lamp, and does not see the light source in the lamp. There is no glare and no glare. As the saying goes, "It is not too bright, but it is too direct."
Start the selection:
1、Choose the lamp with a “shielding angle” at around 45°
▲ The shielding angle: the tangent of the light source and the horizontal line.
For example:
▲Lamps with a shielding angle less than 30° will produce a large brightness to the human eye, glare and glare. One of the criteria for judging the quality of a lamp design: shading angle 45° or more.
There is an easy way to identify the shading angle of the human eye: If you look at the product picture or feel it in kind, the depth “d” ( the light from the lamp plane to the light source”and the length of your thumb are similar, then the shielding is about 45 degrees. This kind of lamp has less glare.
2, If the top mounted embedded lamps, the lamp height can not be too high
If the embedded luminaire height is higher than 10cm, it is not recommended for home installation. It requires a thicker hanging roof. The conventional 2.8m floor height can be made a suspension ceiling, but it is not suitable for thick ceiling. Therefore, the height of the luminaire should be within 7cm. As for the size of the lamp, individually does not feel that it is necessary to pursue a large one. The concealment itself is to keep the ceiling cool, and the fineness and power are the best.
3, If you do not ceiling, use the surface mounting lighting fixture
If it is not suspended ceiling and the lighting is exposed, it must have a beautiful appearance. To do a good job of light and then do a good job of appearance, is an high-end lighting design. Lamps, in the eyes of designers and architects are soft decoration, remember not to careless, directly related to taste. We must remember: when turn on, get good lights and turn off get good appearance.
4、Downlights and Spotlights with beam angle
Conventional homes use 7-12 watts of power. If there is big space, you can choose more power. Look at the first phase of the beam angle; strong overbearing feeling, pull the following part of the case to experience it.
5, Use lamps with stable quality
The light has too much light quality, not so simple as what advertised on all the screens like the Samsung CREE lamp beads. Consumers do not make lights, as long as they will and know how to choose lights, try to avoid the parameters.
Application of downlights and spotlight
Adjust the lighting direction of the luminaire and control the shielding angle so that the luminaire can switch from direct lighting to indirect lighting.
▲Fine-tune the angle of the inner ring of the concealed spotlight, and the direction of the light changes, and the person appears in the shielding angle. Change lighting from direct lighting to indirect lighting
▲ The track lights turn to the wall, and the light reflected by the wall reaches the scope of the human eye. It is soft and comfortable, and direct light becomes indirect light.
Indirect lighting differs from direct lighting in that it is refracted through the medium. The principle of adjustment is: wipe the wall against the wall, control the shielding angle, and avoid glare.
▲The left luminaire is vertically facing the wall, making the part too bright. The refraction of the wall gives rise to human eye brightness and even glare. The right side of the picture will not, the light wipes the wall, the light is soft and even
We described the differences, choices, and applications of downlights and spotlights in the form of comics. I hope everyone can understand the experience.
From the top to the bottom, a fixed downlight is selected, and the width of the irradiation coverage is viewed to see the angle of the light beam. When a light diversity solution is required to be selected by the luminaire, the spotlight is selected, and general lighting and key lighting can also be achieved. Grasp the above principles, you can also become a little lighting division.
]]>Considering the above factors, in the LED screen industry chain in Shenzhen China, we classify the LED chip according to their price grade and we divide them into three grades.
A-Class: Excellent, the quality is fully guaranteed, on behalf of the brand has NATIONSTAR, EVERLIGHT, and so on, and there have gold wire and copper wire versions. Use this kind of LED Chips for projects which need high quality and acceptable price.
C-Class: Average, the price is the lowest version. To win customers with price, because the pursuit of the lowest price, quality is bound to be discounted, normally using alloy wire for the LED Chips. This level LED chips for the projects which price sensitive and no much quality demand.
Let's take a typical one square meter P2.5 LED Display and do a LED chip material cost analysis with different levels of LED Chips so you can understand the difference. (below prices are August 2018 ShenZhen local market prices)
Level | LED Type | Price / LED (USD) | P2.5 LED Qty/Sqm | LED Chip Costs |
A-Class-Gold Wire | SMD2121 | $0.00794 / LED | 160000 | $1269.84/Sqm |
A-Class-Copper Wire | SMD2121 | $0.00492 / LED | 160000 | $787.3/Sqm |
B-Class-Gold Wire | SMD2121 | $0.00635 / LED | 160000 | $1015.87/Sqm |
B-Class-Copper Wire | SMD2121 | $0.00317 / LED | 160000 | $507.94/Sqm |
C-Class | SMD2121 | $0.00206 / LED | 160000 | $330.16/Sqm |
Below is the performance difference from a professional engineer's experience (It is not the exact value, but the value estimated by experience.)
Level | Life Span(Hours) | After 10000 Hours, dead LED rate caused by chips | Light Attenuation Rate | Wavelength Errors | Brightness Errors |
A-Class-Gold Wire | 70000 | 0.03% | 10% / 10000Hours | ± 3nm | 20% |
A-Class-Copper Wire | 70000 | 0.05% | 12% / 10000Hours | ± 3nm | 20% |
B-Class-Gold Wire | 60000 | 0.05% | 10% / 10000Hours | ± 5nm | 30% |
B-Class-Copper Wire | 60000 | 0.07% | 12% / 10000Hours | ± 5nm | 30% |
C-Class | 50000 | 0.15% | 15% / 10000Hours | ± 8nm | 40% |
The answer is DON'T think it too complicated and plan big at first.
First, to have a quick lesson on LED light display screen, let you have a clear picture.
There is 7 factors you need to consider for making a LED light display screen.
* LEDs
* LED Display Modules
* Cabinet
* Control System ( controller box, sending card & receiving card)
* Power Supply
* Data Cable & Power Cable
* Other device/tool need for local assembly
1. The LED Components
The LED light display screen has indoor and outdoor application. Beside the waterproof IP grade, the brightness required for Indoor and Outdoor application are different.
The outdoor LED light display screen need higher brightness than indoor LED light display screen, for it's disclosed under sunshine.
So for the LED components used, according to the brightness level are divided into for regular brightness (800-1000 nits) indoor LEDs and high brightness (4000 - 6000 nits) outdoor LEDs.
And the SIZE of the LEDs limit Pixel Pitch can make for indoor and outdoor LED light display screen.
The smallest indoor LED 0808 allow to make the smallest pixel pitch P1.0 Indoor LED display screen, while there are P1.25, P1.56, P1.667, P1.875, P1.923, P2, P2.5, P3, P4, P5, P6.
The smallest outdoor LED 1921 allow to make the smallest pixel pitch P3.0 Outdoor LED display screen, while there are P4, P5, P6,P6.7, P8, P10.
2. LED Display Modules
For the Modules, points to consider:
* Indoor LED modules and Outdoor LED modules :
Indoor LED Display Modules made with regular brightness LED, there are P1.0, P1.25, P1.56, P1.667, P1.875, P1.923, P2, P2.5, P3, P4, P5, P6 LED Display Screen Modules.
while Outdoor LED Display Modules made with high brightness LED, there are P3.0, P4, P5, P6,P6.7, P8, P10 LED Display Screen Modules.
* The Size of the LED Modules
You need to consider and well-known for the sizes of the LED display screen modules, to calculate the QTY. of LED display screen modules need for LED display screen / wall in different sizes.
And to know for a the same size LED display screen, different Pixel Pitch LED modules used, the PRICES vary quite a lot.
Below is an example to show you. CLICK HERE TO KNOW WHY THERE ARE SO BIG DIFFERENCE.
3. The Cabinets
Two options: Die-casting Aluminum Cabinet and Standard Iron Sheet Simple Cabinet.
1) Die-casting Aluminum Cabinet: Need mold, is extruded to form via Molding Machine, and it has features as " High Quality Aluminum Alloy with Good Dissipation, High Brightness, High Grey Scale, Seamless Assembly, Silent Design with Fan-less Design".
2) Iron Sheet Standard Cabinet: Simple made, and can custom-make to any sizes. Note: customized size need to match with the LED display screen modules. Features: Light Weight, Independent disassembly box, High Brightness, High Grey Scale, Cabinet Size and Shape can be Customized Freely.
4. Control System (controller box, sending card & receiving card)
* The brands of controller/card depends on the customer preferences. If no special requirement, we will recommend the most cost-efficient model to our clients.
* The controlling pixel pitch qty. of those devices.
Each model of the controller/card has its max loading pixel pitch quantity (LED quantity). We learn before that the different pixel pitch LED display modules vary a lot.
How many control card need for a LED display screen depends on the Pixel Density and the control card's spec.
The control card's Loading Capacity should bigger than the Pixel Density of your LED display screen.
Below picture show the Pixel Density for different LED Display Modules.
Below picture shows the Loading Capacity of different control card.
5. Power Supply
For the installation space is narrow, the power supply used for LED display screen should be small and in low profile.
QTY. need for different project, we can give your calculation.
* CE approved or UL approved
* Famous brand or common brand
6. Data Cable & Power Cable
We will give you the QTY. of each cable need, once get known of your projects.
7. Other device/tool need for local assembly
* Tools: Screw Driver, Multi-meter
* Aging test mounting bracket for LED display screen modules, we can give you solution for what we use in our own factory.
* Finished LED Display Screen Cabinet AgingTest Frame , we can give you solution for what we use in our own factory.
* Training ( assembly operator and software knowledge, we can provide the training).
]]>
1. There are different cover types: Oyster White (Opal Matte), Frosted (Semi-transparent), and Clear (Transparent).
The Oyster White cover get the LED lights hidden completely when unlit, and only show a little spot when power on.
2. The aluminum profiles have different size, there are a DEEP channel and SHALLOW channel. The one with DEEP channel, the LED strip (the lighting source) is farther away from the cover, which gives a less spotty look.
And also if the LED strip has more bulb intensity, the lighting effect is more spotless than the strip with fewer bulbs.
]]>]]>
B.Solder wire to the strip light and test connection: Be sure no solder points or fray wires are touching,test your connection before installation.
C.Heat shrink over a connection: Exposed copper with no 3M mounting tape or heat shrink will cause an electrical short on the aluminum channel.
D. Install closed end cap (optional): End caps are an optional accessory and give your channel a finished look while blocking light leakage.
E. Measure and cut strip light: Always cut your strip light on the cut line between the copper pads. Cutting elsewhere will damage that section of the strip.
F. Peel tape and adhere strip: For best lighting results center stick your strip light between end caps or channel ends.
G.Measure cover for end cap space (optional): End caps require a small amount of space, measure this space and cut your cover accordingly.
H.Cut and press cover: Be sure to make a straight and square cut to avoid any gaps for light to escape.
I. Wire to power and enjoy: Now that your channel is complete you can wire it to your low voltage power or control source, Install the channel in your prefer installation form--surface, recessed, corner, hanging.
Actually, we can custom your prefer length, things get easier to do with all accessories. Just contact us.
Now let’s view 4 typical installation ways and their effect.
1.Surface Installation.
2.Recessed Installation.
3.Corner Installation.
4. Hanging Installation.
]]>
Item |
PC |
PMMA |
Full Name |
Polycarbonate |
Polymethyl Methacrylate |
Transmittance |
>88% |
>92% |
Flammability |
Low flammability |
Slow burning, not recommended in areas fire may be presenting |
Mechanical Properties |
Higher chemical resistance, does not crack in the drilling tests, be available in flexible grades |
Can be polished to restore, low chemical resistance, more impact resistance, not being scratched easily |
Temperature handling |
Up to 190 deg F |
Up to 240 deg F |
Which one is best for you? Confirm the above reliable factors to make an analysis.
First, the plug-in module
It means that the lamp of DIP package passes the lamp foot through the PCB board, and the tin is filled in the lamp hole by soldering. The LED module made by this process is the plug-in module; the advantage is that the viewing angle is large, the brightness is high, and the heat is dissipated. Good; the disadvantage is that the pixel density is small.
Second, the surface module
The surface mount is also called SMT. The SMT packaged lamp is soldered to the surface of the PCB board by soldering process. The lamp pins do not need to pass through the PCB board. The advantages are: large viewing angle, soft display image, high pixel density, suitable for indoor viewing; The brightness is not high enough, and the heat dissipation of the lamp itself is not good enough.
Third, the sub-surface module
It is a product between DIP and SMT. Its LED lamp has the same package surface as SMT, but its positive and negative pins are the same as DIP. It is also soldered through the PCB during production. The advantages of the LED module are: high brightness, good display effect, and the disadvantages are: complicated process and difficult maintenance.
Four or three-in-one form stickers
It refers to packaging three different color LED chips of R, G and B in the same glue body; the advantages are: simple production and good display effect, the disadvantages are: the separation and separation of color is difficult, and the cost is high.
Five, three in one surface
It means that the three independent SMT lamps of R, G and B are vertically juxtaposed at a certain interval, which not only has all the advantages of three-in-one, but also solves various shortcomings of three-in-one.]]>When select a profile for a strip light, you need to consider below points:
1) The strip dimension: the profiles has its inner width and height that limits the strips that it can take.
2) The strip intensity and the lighting effect you want to get. Gental and spot-free lighting or dazzling light?
If need no spot light effect, please select the oyster white cover which hidden the LED strip while naked eye cannot see when it's not lit.
And use a strip with high intensity and choose an aluminum profile that is deeper in height.
3) Where will you use the strip? Wet location or dry location? If wet, better to use the waterproof strip for most of the aluminum profiles are not waterproof.
4) The mounting way of the strip lighting: surface, recessed or suspension mounting? We provide Aluminum Profiles and accessories fit for those different applications.
]]>
2, dispensing: it is to drop the glue to the fixed position of the PCB, its main role is to fix the components to the PCB. The equipment used is a dispenser, located at the forefront of the SMT line or behind the inspection equipment.
3. Mounting: Its function is to accurately mount the surface-assembled components to the fixed position of the PCB. The equipment used is a placement machine located behind the screen printing machine in the SMT production line.
4. Curing: The function is to melt the patch glue, so that the surface-assembled components and the PCB board are firmly bonded together. The equipment used is a curing oven located behind the placement machine in the SMT line.
5, SPI: After the printing machine, for the quality inspection of solder printing and verification and control of the printing process.
6. Reflow soldering: Its function is to melt the solder paste, so that the surface-assembled components and the PCB board are firmly bonded together. The equipment used is a reflow oven located behind the placement machine in the SMT line.
7. Cleaning: The function is to remove the welding residue (such as flux) which is harmful to the human body on the assembled PCB board. The equipment used is a washing machine, the position can be fixed, it can be online or not.
8. Inspection: The function is to test the quality and assembly quality of the assembled PCB. The equipment used includes a magnifying glass, a microscope, an on-line tester (ICT), a flying probe tester, an automatic optical inspection (AOI), an X-RAY inspection system, and a function tester. The position can be configured in a suitable place on the production line according to the needs of the inspection.
9, repair: its role is to detect the failure of the PCB board rework. The tools used are soldering irons, rework stations, and the like. Configure anywhere in the production line.
]]>]]>
1.No autos(people): Based on microwave radar sensor technology of sending the signal to LED motion sensor LED tube, each response or signal will be undergoing with the intelligent control. glimmering at only 4~6W power consumption if sleep mode has been launched, the most saving of energy could be up to 90%.
2.Ignite-on: Under this style's launching, either people's walking-by or driving cars in, both of them will trigger the sensor, and so the power will increase to 18W, working efficiently of the motion sensor will give a bright look.
3.After leaving-away: It will go back to sleep mode within 30s until the next switch of full lighting is re-working for you, maybe.
According to the actual area of the product and the length and brightness of the fan blade, it is divided into many styles and specifications, but the essence is the same. The creative materials and contents to be played are stored through different paths and transmission methods. In the storage space of the machine itself. Through the software to process the video and image dot matrix to achieve the desired holographic effect
]]>Removing or bypassing the ballast involves some simple re-wiring of the light fixture. This sounds intimidating, but is actually quite simple and can be done with common tools. Ballast by-pass LED tubes eliminate the need for an external driver or ballast.
For new construction installations, simply connect the line voltage directly to the sockets.
For retrofit installations, bypass the existing ballast by cutting the wires and connecting the line voltage directly to the sockets. No ballast or driver is required. If the Ballast-Compatible version tubes, then it can direct installation for retrofit cases, no need to make any change in the old fixtures' circuit.
There are a few important considerations when removing the ballast, such as whether to use Double Ended Powered, or Single Ended Powered LED tube lights. It's important to follow a guide.
]]>LED bar screen is led light sticking on acrylic board, it needs to attach to glass, so led lamp heat dissipation is hindered. The new transparent LED screen adopts GOB manufacturing technology, breaking the defect of LED bar screen, making the transparent LED screen realize the characteristics of real moisture-proof, waterproof, dust-proof and UV-resistant so that the transparent LED screen can be used in any harsh outdoor environment.
The conventional LED screen |
Transparent LED Screen Display |
#1 Driver used
The design of the driver takes a very important role in the tube pricing.
The simple linear power is easier in design and cheap. The constant current driver is more complicated and reliable design. And again there is the isolated driver and isolated driver, which cause difference too. For cased the tubes are easy to get access by people is better to use the isolated driver which is much safer.
#2 Housing material used
The housing for tubes, there are Aluminum housing + PC lens, all plastic housing, glass housing.
The Aluminum Housing is the best, for it helps the LED heat dissipation. And again, the weight of the Aluminum Housing will cause a difference in prices.
The heavier aluminum housing is more firm and not easy to deform.
#3 LED Components used, the luminous efficiency, CRI
The LEDs are available in different level brightness, like 80LM/W, 100LM/W, 130LM/W or 150LM/W and more. The brighter, the more expensive.
But it's not the brightest the best, please choose the one that fit for your case. For example, if used in warehouse/aisle, you do not expect to get too much brightness.
High CRI LED will give much better vivid colors, which is widely used in ART gallery, Jellewery Store, or similar application.
The CRI80 is the frequently-used one for general lighting.
]]>Patented GOB technology can effectively protect the LED packaging unit, which is enough to resist extreme harsh use environment, realize real waterproof, dust-proof, anti-impact, anti-UV, and can avoid the phenomenon of light drops.
]]>
The main difference is in size…the T8 is one inch in diameter and everything else is divisible by that number: T5 = 5/8 inch, T6 = 6/8 inch, T8 = 1 inch, T10 = 1.25 inches (10/8), T12 = 1.5 inches in diameter (12/8).
They are available in same lengths and same base types.
Usually the old T10 and T12 tubes, are comes in 8ft with Fa8 or R17d base, instead of G13 bi-pin base.
Now the LED Tubes T8 are available for all those base and 8ft, and also 2ft, 3ft, 4ft, 5ft, 8ft too.
So it's quite convenient to use a T8 LED Tube to replace the old T10 and T12 tubes.
While the size is the main difference there are other differences that are worth mentioning.
In general, T8 use electronic ballasts while T12 use magnetic ballasts. Opening the fixture and examining the ballast will give you the ultimate answer as to what type of ballast you have;
but, in general, the older the fixture, the more likely it is to have a magnetic ballast. You can purchase the ballast-compatible LED Tubes if do not want to make any change in your old tube fixtures.
Or to save cost, to buy the ballast by-pass LED Tubes, which will need to change wire in the tube fixture to by-pass the wire to the old ballast.
Please follow the page : https://www.led-lights.com/how-to-replace-an-old-fluorescent-tube-with-led-tube-light-a-10
One more point need to emphasize. The T12 old tubes, the T12 sockets of the "Non-Shunted Rapid Start" type, which require the tubes to be single-end power feed type.
There are single-end power feed and dual-end power feed tube, most of the LED T8 tube are default to be dual-end power feed type.
So when you use the T8 to replace the T12, please double-check about the power feed types of your old tubes.
]]>1. Firstly you need to make sure you purchased the dimmable LED Tubes.
2. And before that if it's retrofit installation, and you already have the dimmer in your circuit, please check and get known what's kind of dimmer in your housing.
Usually the old fluorescent tubes installation, it's the TRIAC Dimmer (phase dimming).
3. The dimmable LED Tubes we provide are mostly this the TRIAC dimmable ones. With this kind of tubes, you can dim the tubes with your existing dimmer directly.
Problems&Solution:
First, let’s look at some of the symptoms you may encounter when the dimmer and the LED lamp or fixture are not compatible.
Drop and Pop – When sliding the dimmer to a lower light output, the light may suddenly cut out altogether, or, when sliding the dimmer to get a higher light level, the light unexpectedly jumps to full brightness.
Gaps – When sliding the dimmer along the full range from highest light level to lowest, there are parts of the range where nothing happens when the dimmer slider is moved.
Ghosting – The dimmer slider is at the bottom of the dimming range which should be OFF, but there is a glimmer of light still coming from the lamp. Many LED lamp dimming specifications will indicate that you can dim the light output down to 10% of full brightness and then the lamp will go off. Ghosting may occur with lamp / dimmer incompatibility.
Flicker and Flash – When paired to a dimmer, the lamp produces pulsating bursts of light. This symptom is an obvious sign of incompatibility.
So how can you prevent these annoying problems in your application.
(1) Make sure the LED lamp or fixture specifications indicate it is dimmable.
(2) If you are pairing your LED lamp to an existing dimmer, see if that dimmer is on the dimmer compatibility list that the LED lamp manufacturer should provide.
(3) If you cannot locate a dimmer compatibility list, try to determine if the existing dimmer is “leading edge” or “trailing edge” type dimmer. These two types of dimmers modulate light level by altering the voltage at different phases of an alternating current’s sine wave. Leading edge is by far the most common dimmer used with incandescent and halogen lamps. They are normally designed for higher wattage than the LED replacement lamp will have. When leading edge dimmers are used with LED, chances of encountering some of the symptoms above are high. Trailing edge dimmers are designed specifically for LED. They work with lower wattages and they are made to be digitally compatible with LED. You may need to replace your existing dimmer with a “trailing edge” type dimmer to get good dimming functionality.
(4) For commercial and institutional installations where multiple lamps and dimmers may be involved, it is always safest to purchase one or two units and test those with the existing dimmer control.
]]>
LL-HA-50-WF-DS-X &LL-HA-50H-WFC-DS-X LL-HA-65-WF-DS-X & LL-HA-65X-WFC-DS-X & LL-HA-100-WFC-DS-X please download the app from https://www.dseelab.com/resource/software
Remark : Not fit for LL-HA-43-SDWF-FT-X & LL-HA-65X-SWF-ZB-X & LL-HA-100-SWF-ZB-X.
42cm is the SD card version. It is downloading the required material directly to the SD card and then use the controller to control the playback.
]]>The Driver built-in are different a lot in prices.
Linear IC Driver
Non-isolated Driver
Isolated Driver
]]>5. The spring clips on both sides of the downlight are unfolded. The card needs to be installed on the back side. Finally, the bulb is replaced to complete the installation of the downlight.
]]>Just like the most important factor in relation with LED display resolution, we define a module as P2, P2.5, P3, etc, which is consisting of the letter 'P' and a number affixed next, this letter here
is standing for Pixel Pitch, or dot pitch, the number is saying that the accurate distance measuring in millimeters.
Actually, pixel pitch indicates the space from the center of a pixel to the center of the adjacent pixel, the larger pixel pitch means there is more space between pixels, determine
the pixel density and the display resolution finally.
You can get the best value for choosing the right pixel pitch, smaller pixel pitch fit into the same physical size with more pixels, standing for the density and resolution.
For example, the cost of smaller pixel pitch will expense more, improving visual quality, at a viewing distance giving you quality image.
]]>